Setting Up Your First Google Workspace Account A Step-by-Step Guide

Setting Up Your First Google Workspace Account: A Step-by-Step Guide

Google Workspace, formerly known as G Suite, is a powerful suite of productivity and collaboration tools designed for businesses, educational institutions, and individuals. Setting up your first Google Workspace account can significantly enhance your organization’s communication, collaboration, and productivity. This comprehensive guide will walk you through the entire process step by step.

Step 1: Understand the Benefits of Google Workspace

Before diving into the setup process, it’s essential to understand what Google Workspace offers:

  • Professional Email: Use your domain for email addresses (e.g., yourname@yourcompany.com).
  • Collaboration Tools: Google Docs, Sheets, Slides, and Forms for seamless teamwork.
  • Storage: Secure cloud storage through Google Drive.
  • Communication Tools: Google Meet and Chat for video conferencing and instant messaging.
  • Security: Advanced security options, including two-factor authentication (2FA).

Step 2: Choose a Google Workspace Plan

Google Workspace offers different plans tailored to various business needs. These include:

  • Business Starter: Ideal for small teams.
  • Business Standard: Provides more storage and enhanced collaboration features.
  • Business Plus: Includes additional security and compliance tools.
  • Enterprise: Best for large organizations with extensive requirements.

Visit the Google Workspace pricing page to compare plans and choose the one that fits your needs

Step 3: Register for Google Workspace

1. Go to the Google Workspace Signup Page

Visit the Google Workspace website and click Get Started.

2. Enter Your Business Information

Provide essential details such as your business name, number of employees, and country.

3. Set Up Your Admin Account

Create your admin account by entering your name, a desired username, and a password.

4. Verify Domain Ownership

If you already own a domain, enter it during the setup. If not, Google allows you to purchase a new domain directly.

Step 4: Verify Your Domain

1. Access Domain Settings

Log into your domain registrar’s website.

2. Add TXT Record

Copy the TXT verification record provided by Google and add it to your domain’s DNS settings.

3. Confirm Verification

Go back to the Google Workspace setup page and click Verify. Domain verification may take a few minutes to complete.

Step 5: Set Up Email with Google Workspace

To use Google Workspace for your professional email, you’ll need to update your domain’s MX records.

1. Access Domain DNS Settings

Navigate to your domain registrar’s DNS management section.

2. Add Google MX Records

Enter the following Google MX records:

  • Priority: 1; Mail Server: ASPMX.L.GOOGLE.COM
  • Priority: 5; Mail Server: ALT1.ASPMX.L.GOOGLE.COM
  • Priority: 5; Mail Server: ALT2.ASPMX.L.GOOGLE.COM
  • Priority: 10; Mail Server: ALT3.ASPMX.L.GOOGLE.COM
  • Priority: 10; Mail Server: ALT4.ASPMX.L.GOOGLE.COM

3. Save Changes and Test

Save the updated records and test your email by sending and receiving messages.

Step 6: Configure User Accounts

1. Add New Users

In the Google Admin console, go to Directory > Users and click Add New User. Fill in the required details, including name and email address.

2. Assign Roles

Designate roles for each user (e.g., Admin or standard user) based on their responsibilities.

Step 7: Customize Security Settings

1. Enable Two-Factor Authentication (2FA)

Go to Security > Authentication and turn on 2FA for added account protection.

2. Set Password Policies

Establish password requirements to ensure strong security practices.

3. Review Access Controls

Limit access to sensitive information and grant permissions on a need-to-know basis.

Step 8: Set Up Google Workspace Apps

1. Configure Google Drive

Organize files by creating shared drives for different teams and projects.

2. Enable Google Meet and Chat

Allow team members to schedule meetings and communicate in real time.

3. Set Up Google Calendar

Share calendars across the organization to streamline scheduling.

4. Integrate Third-Party Apps

Browse the Google Workspace Marketplace to find and install apps that enhance productivity.

Step 9: Train Your Team

Provide training sessions to help your team become familiar with Google Workspace tools.

  • Online Tutorials: Direct team members to Google’s Help Center.
  • Live Training: Conduct hands-on sessions.
  • Documentation: Create a user manual tailored to your organization’s needs.

Step 10: Monitor and Manage Your Google Workspace Account

1. Regularly Review Security Reports

Access the Admin console to review security insights and take corrective actions if needed.

2. Manage Storage Usage

Monitor and manage storage allocations to ensure efficiency.

3. Update Settings as Needed

Stay updated on new features and adjust settings based on your organization’s evolving requirements.

Conclusion

Setting up your first Google Workspace account is a crucial step in enhancing your organization’s productivity and collaboration. By following this step-by-step guide, you’ll have a fully functional and secure Google Workspace environment tailored to your needs. Stay proactive in managing and optimizing your setup to reap the full benefits of this powerful platform.


Contact us

The Complete Guide to set up google workspace account

The Complete Guide to set up google workspace account

The Ultimate Guide to  set up Google Workspace Account

Setting up a Google Workspace account is a straightforward process that involves a few critical steps to ensure your business or organization can fully utilize the powerful suite of tools offered by Google. This guide provides a step-by-step walkthrough tailored to meet your specific needs.

Step 1: Get Started with Google Workspace

  1. Visit the Google Workspace Website
    Navigate to the Google Workspace website and click on “Get Started.”
  2. Choose a Plan
    Select a plan that fits your business needs. Options include:

    • Business Starter
    • Business Standard
    • Business Plus
      Each plan varies in features and storage capacity.
  3. Create an Account
    • Enter your business name and the number of employees.
    • Provide your contact details, such as an email address and phone number.
  4. Set Up a Domain
    • Use an existing domain or purchase a new one through Google.
    • Your domain will host your business email (e.g., info@yourdomain.com).

Step 2: Verify Your Domain

  1. Domain Verification
    Google requires domain verification to confirm ownership.
  2. Access DNS Settings
    Log in to your domain registrar (e.g., GoDaddy, Namecheap) and locate the DNS settings.
  3. Add a TXT Record
    Copy the TXT record provided by Google and add it to your domain’s DNS settings. This process may take some time to propagate.
  4. Complete Verification
    Return to the Google Workspace setup page and click “Verify.” Once verified, proceed to the next step.

Step 3: Add Users and Configure Settings

  1. Add Users
    Input the email addresses and names of employees or team members. Each user will receive a Google Workspace account.
  2. Configure Permissions
    Assign roles and permissions based on organizational needs:

    • Administrators: Full access to manage settings.
    • Users: Standard access.
  3. Set Up Email Routing
    Ensure emails sent to your old domain are redirected to the new Google Workspace email addresses.

Step 4: Set Up Google Workspace Apps

  1. Gmail
    • Customize business email settings.
    • Create custom email addresses (e.g., support@yourdomain.com) and configure forwarding and filters.
  2. Google Drive
    • Organize storage using folders and shared drives.
    • Set access permissions for viewing, editing, and sharing files.
  3. Google Calendar
    • Set up individual and shared calendars.
    • Schedule meetings and integrate with Google Meet.
  4. Google Meet and Chat
    • Configure video meeting and chat communication settings.
    • Utilize Google Meet for video calls and Chat for team collaboration.

Step 5: Security and Compliance

  1. Enable Security Features
    • Two-factor authentication (2FA)
    • Password policies
    • Data loss prevention (DLP)
  2. Ensure Compliance
    • Adhere to standards like GDPR, HIPAA, or CCPA.
    • Use compliance tools for data governance and audit logs.
  3. Admin Console
    Manage users, devices, and apps through the centralized Admin Console.

Step 6: Migration and Training

  1. Data Migration
    Transfer emails, contacts, and calendar events from your previous provider (e.g., Microsoft Exchange or Outlook).
  2. Training
    Train your team using Google’s tutorials, webinars, and support resources.
  3. Support
    Leverage Google’s 24/7 support via chat, email, or phone for any assistance.

Step 7: Continuous Management and Optimization

  1. Monitor Usage
    Use reports in the Admin Console to track usage and identify areas for improvement.
  2. Update Settings
    Regularly review and adjust settings to align with changing business needs.
  3. Explore New Features
    Stay updated on new tools and features to boost productivity.

Conclusion

Setting up Google Workspace is a multi-step process, but it can significantly enhance your team’s productivity and collaboration. Follow this guide for a smooth transition and provide your organization with powerful tools to achieve its goals. For additional support, visit the Google Workspace Help Center or contact Google Workspace Support.

Build a Website with WordPress

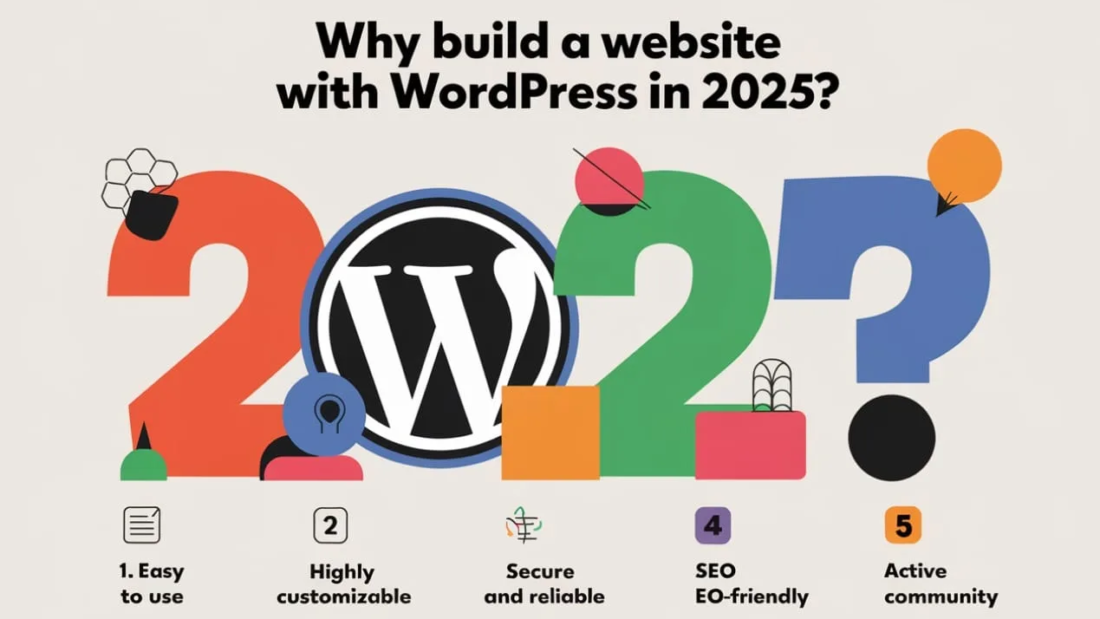
Build a Website with WordPress in 2025: Easy, Customizable, and SEO-Friendly Solutions

Build a Website with WordPress in 2025: Easy, Customizable, and SEO-Friendly Solutions.

Build a website with WordPress is an excellent choice for both beginners and experienced users. WordPress is an open-source platform that powers over 40% of all websites on the internet, making it one of the most popular and reliable website-building tools available today. Whether you’re building a personal blog, a business website, or an e-commerce store, WordPress offers a wide range of benefits, including user-friendly features, customization options, SEO advantages, and mobile responsiveness.

Here’s why WordPress remains one of the best platforms to build your website in 2025:

1. Simple and User-Friendly

WordPress is designed to be easy to use, even for those with no technical experience. Its intuitive dashboard allows users to manage content, design pages, and publish posts without needing to know any programming language. With a wide selection of drag-and-drop page builders and customizable templates, you can create and manage a professional website without much effort. Its ease of use has made WordPress the go-to platform for millions of individuals and businesses around the world.

2. Extensive Customization Options

One of WordPress’s standout features is the extensive customization options it offers. The platform provides thousands of themes and plugins, allowing you to personalize your website to fit your needs. Whether you’re building a blog, an online store, or a corporate site, you’ll find a theme that fits your brand. In 2024, WordPress has continued to enhance its theme and plugin options, offering even more flexibility and advanced features to help businesses create unique and tailored websites.

3. SEO-Friendly

Search Engine Optimization (SEO) is essential for any website that aims to attract organic traffic, and WordPress excels in this area. WordPress websites are naturally SEO-friendly, and plugins like Yoast SEO and Rank Math further enhance the platform’s ability to optimize your content for search engines. In 2024, indexing content with Google has become even easier, allowing you to quickly ensure your website ranks higher on search engines. WordPress offers built-in tools to help you optimize your content, metadata, images, and more, making it easier to gain visibility.

4. Mobile-Friendly Design

With mobile usage continuing to rise, it’s essential to have a website that works seamlessly across all devices. In 2024, WordPress ensures that all themes are mobile-responsive, meaning they automatically adjust to look great on smartphones, tablets, and desktops. A mobile-friendly design is critical for user experience and search engine rankings, and WordPress’s responsive themes ensure that your website will be accessible and easy to navigate on any device.

5. Security

Security is a top priority when building a website. WordPress offers regular updates and built-in security features, making it a safe and secure platform to work with. In addition, there are various security plugins available, such as Wordfence and Sucuri, that help protect your website from hacking attempts and malware attacks. Given the increasing prevalence of cyber threats, these added layers of protection are essential for keeping your website and its data safe.

6. Large Community and Support

WordPress has a large and active community of users and developers who provide continuous support. Whether you’re troubleshooting an issue or learning how to implement a new feature, you’ll have access to countless tutorials, forums, and other resources. There are also many WordPress agencies and freelancers who specialize in helping businesses build and manage WordPress websites. This sense of community and the wealth of support options are great for anyone, whether you’re a beginner or an experienced web developer.

7. E-Commerce Integration

If you want to sell products online, WordPress integrates perfectly with WooCommerce, one of the most popular e-commerce platforms. In 2024, WooCommerce has become even more refined, offering an easier and more intuitive way to create an online store. WooCommerce provides all the necessary tools to run a successful e-commerce business, including inventory management, payment processing, product cataloging, and more. With the ongoing improvements, you can expect an enhanced and streamlined experience when building your online store.

8. Scalability

WordPress is scalable and flexible, making it ideal for any project, from small blogs to large business websites. As your business grows, WordPress allows you to scale your site without worrying about performance issues. With plugins, custom themes, and enhanced hosting options, WordPress can handle websites of all sizes and complexities. You can easily add new pages, products, or features to your site as your business needs evolve.

By building your website on WordPress in 2025, you’re ensuring that your site is aligned with the latest digital trends, offers an excellent user experience, and can easily grow with your business.

Weebly vs WordPress: A Comparison

When deciding between Weebly and WordPress for building a website, it’s important to understand the key differences between these two platforms. Both are popular website builders, but they cater to different types of users and businesses. Let’s compare them based on several factors:

1. Ease of Use

  • Weebly: Known for its user-friendly drag-and-drop interface, Weebly is great for beginners who want to quickly set up a website without much hassle. It’s a fully hosted solution, meaning you don’t need to worry about web hosting or technical aspects.
  • WordPress: While WordPress is also user-friendly, it requires a little more technical knowledge, especially if you’re self-hosting. WordPress offers more flexibility and customization, but it may require a steeper learning curve for beginners.

2. Customization

  • Weebly: Weebly offers basic customization options. While it has a good selection of templates, the customization is limited compared to WordPress. You can tweak your site’s look and layout, but you’re confined to Weebly’s design structure.
  • WordPress: WordPress wins when it comes to customization. With thousands of themes, plugins, and the ability to edit the code, WordPress allows for a high level of flexibility. It’s a better choice for users who want full control over their website’s design and functionality.

3. SEO

  • Weebly: Weebly has basic SEO features, such as the ability to edit metadata, URLs, and alt text for images. However, it doesn’t offer the same advanced SEO tools as WordPress.
  • WordPress: WordPress is much more SEO-friendly, offering powerful plugins like Yoast SEO and Rank Math, which help optimize your content. WordPress websites are generally better at handling SEO and can be optimized with greater detail.

4. E-Commerce

  • Weebly: Weebly offers built-in e-commerce functionality that’s simple to use and ideal for small stores. It has a range of payment options, product management tools, and basic features for running an online store.
  • WordPress: With WooCommerce, WordPress provides a far more robust e-commerce solution. WooCommerce offers more advanced features, better customization, and scalability, making it a better option for businesses that plan to grow or require more sophisticated e-commerce capabilities.

5. Cost

  • Weebly: Weebly has a free plan with limited features, and its premium plans start at a relatively affordable price. However, some features, like e-commerce, require an upgraded plan.
  • WordPress: WordPress itself is free, but you’ll need to pay for hosting, domain registration, and premium themes or plugins. The overall cost of building a WordPress website can be higher, especially if you require specialized features or design work.

6. Support

  • Weebly: Weebly provides customer support via email, chat, and a knowledge base. However, its support options can be limited compared to WordPress.
  • WordPress: WordPress has a massive community, with numerous forums, tutorials, and developers available to offer help. You can also hire WordPress experts for specific issues, but there’s no direct customer support as it’s an open-source platform.

7. Scalability

  • Weebly: Weebly is a great option for small websites or businesses. However, as your business grows, you may find Weebly’s limitations in terms of customization and scalability.
  • WordPress: WordPress is highly scalable, making it ideal for businesses of all sizes. It can handle small blogs, large corporate websites, and even complex e-commerce stores, allowing for seamless growth.

Conclusion

Both Weebly vs WordPress are great platforms for building websites, but they serve different needs. Weebly is an excellent choice for beginners or small businesses who want a simple, easy-to-use website with basic e-commerce functionality. On the other hand, WordPress is better suited for those who need a highly customizable, SEO-friendly platform that can grow with their business. WordPress excels in flexibility, scalability, and control, making it the top choice for users who want to create a more complex or feature-rich website.

Ultimately, the decision depends on your website’s needs, your level of technical expertise, and how much you want to customize your site.

Build a website with WordPress Build a website with WordPress Build a website with WordPress Build a website with WordPress Build a website with WordPress Build a website with WordPress Build a website with WordPress Build a website with WordPress Build a website with WordPress Build a website with WordPress

How to Use WooCommerce as a Catalog

How to Use WooCommerce as a Catalog

How to Use WooCommerce as a Catalog Isn’t it true that the purpose of an internet store is to earn sales? Generally speaking. However, “making sales” does not always imply taking payment for your thinghttp://WooCommerces over the internet.

When you put your WooCommerce store in catalog mode, you may show off your products without allowing customers to buy them. While this may appear paradoxical, there are a number of reasons why businesses might desire to do so. Let’s look at why this is and how to make your store work as a catalog.

Why build a WooCommerce site that doesn’t sell anything?

More information and more visibility are always good things when it comes to your business. So even if you don’t want to accept online orders, adding a full gallery of your products and offerings on your website can still have an impact on your bottom line.

Even without actually allowing sales, a catalog-style website can help build your business and maximize profits by:

  • Boosting your SEO: Each product becomes a page full of relevant keywords and descriptions for search engines to index.
  • Building buzz around your brand: New products and offerings are given their own page that’s perfect for social sharing and sending to your top clients.
  • Highlighting must-have solutions: Share fixes to customers’ problems and invite them to reach out for a quote.
  • Saving time for your employees: Provide a searchable index of products. Clients and customers can find answers to their questions on your site rather than having to reach out to a sales rep.
  • Providing analytics: Learn which product pages are the most popular with customers and use this data to guide future product development.

Who can benefit from a catalog website

Online catalogs can be a good fit for many types of businesses. This can be your end goal, or just one step on the way to creating a full-scale eCommerce store. Your business might benefit from a catalog site if:

  • You prefer to sell your products in physical stores or at events. You might prefer in-person sales if you’re a cash-based business, a crafter who doesn’t want the overhead of shipping, or a small business that finds it easier to manage inventory with only one sales channel. But an online showcase of your wares can still let people know that your store or event is worth a visit.
  • You sell custom items that require quotes. You might sell custom items that require talking to your client first and putting together a unique package for them. In this case, you can include various options in your catalog, but redirect customers to a form to request a quote instead of allowing them to purchase directly.
  • You want to provide information for stores that want to sell your products wholesale. If you’re a wholesale supplier or mostly do B2B transactions, then you don’t want an online shop that is open to the general public. Whether you want potential retailers to contact you directly or make online orders through a private account, catalog mode can help you get the conversation started.
  • Your product pricing is volatile. If you sell items that are tied to market value and prices change daily, then it may not be practical to invest time in keeping your website constantly up to date. Instead, catalog mode can allow you to show your products and take orders through a form that can then be converted into a manual transaction with a properly calculated price.
  • You’re taking a break from selling online. Perhaps you need time to align your inventory, or maybe you just need some personal time off. Converting your online shop to catalog mode is a great way to hang a metaphorical “closed” sign on your door while preserving your search engine rankings.

How to use WooCommerce as a catalog

When using WooCommerce as a catalog, start by creating your products. Then, you’ll want to do two things:

  1. Remove, redirect, or restrict all “Add to Cart” buttons, and
  2. Remove or restrict all cart and checkout pages and functionality.

You can set up your catalog by using a custom code snippet or an extension that will handle the details for you.

Option 1: the Advanced Catalog Mode for WooCommerce extension

blog Advanced Catalog

An extension is a great way to create an online product gallery. The Advanced Catalog Mode for WooCommerce extension offers a wide range of functionality and is ideal for online shops that will cater to different categories of clients on an ongoing basis. You’ll be able to customize every aspect of how your catalog works with just a few clicks.

With Advanced Catalog Mode, you can:

  • Redirect Add to Cart buttons to a page with a quote or inquiry form.
  • Replace Add to Cart buttons with a message with instructions, like “contact us for a quote.”
  • Remove all prices.
  • Hide Cart and Checkout pages.

All controls are based on user roles as well, which means that you can allow some users — like your wholesalers — to continue to use the shop in regular mode, while guests can only see the shop in catalog mode. In addition, you can fine-tune which products are in and out of the catalog version, allowing some products to be purchased, while others are viewed only.

Option 2: the Catalog Visibility Options extension

blog Call for

For a simpler solution, try the Catalog Visibility Options extension. Ideal for shops that want to set up a simple lookbook, this easy-to-use extension converts WooCommerce into a gallery.

Use the extension to:

  • Remove the Add to Cart button or redirect it to a product inquiry/quote form.
  • Remove the Checkout and Cart pages.
  • Hide prices, or display different prices to guest shoppers and logged-in users.

Option 3: the Catalog Visibility for WooCommerce extension

blog Hide Catalog

The Catalog Visibility for WooCommerce extension is a great choice for sites that do mainly B2B sales to different wholesalers with different contract parameters. It offers detailed control over individual users, so you can make sure that only authorized buyers can purchase your products, at the right prices, in the right combinations.

With this extension, you can control product and pricing visibility based on:

  • Individual user profiles.
  • Categories of users.
  • Location of users.
  • The average total value of past purchases.

You’ll be able to create a highly-customized shopping experience for each of your regular wholesale customers. Once they log in, they’ll be shown the products that fit their profile and can shop for the ones that best suit their needs.

Option 4: Custom code snippets

If you’re comfortable working with code, you can add some custom code snippets to your site to remove or change WooCommerce checkout functionality. This code can be added to your theme’s functions.php file for a very lightweight, fully customized catalog solution.

You can write snippets that will:

  • Remove Add to Cart buttons and replace them with a “please contact us for pricing” message, and remove all cart and checkout pages (try this snippet from the Business Bloomer blog).
  • Remove Add to Cart buttons for logged-out users, but allow logged-in users — such as your approved wholesale partners — to build a cart and check out (try this alternate Business Bloomer snippet).
  • Simply remove all pricing messages and buttons to create a clean, basic gallery (give this Business Bloomer snippet a go).

These snippets can be mixed and updated as needed if you’ve worked with WooCommerce hooks before. The Add to Cart buttons, for example, might be adjusted to lead to a quote request form, or further limits on users or product types could be introduced to limit who can buy what.

Always remember to keep your clients informed when working on your website! Explain how everything works and how potential customers can buy your products when you set up a catalog-style online store, whether in person or by contacting you directly via email. Keep your catalog current with your most recent products, and your bottom line will benefit.

How to Use WooCommerce as a Catalog How to Use WooCommerce as a Catalog How to Use WooCommerce as a Catalog How to Use WooCommerce as a Catalog How to Use WooCommerce as a Catalog How to Use WooCommerce as a Catalog How to Use WooCommerce as a Catalog How to Use WooCommerce as a Catalog How to Use WooCommerce as a Catalog How to Use WooCommerce as a Catalog How to Use WooCommerce as a Catalog